Halloween Horrors — Creating Visual Cues to Foster Fright
When visualizing the terrifying images of the horror genre, the cinematographer can be faced with many challenges.

Somewhere lurking in the shadows is the essence of true terror — whether it be a snarling beast, a raging killer or a supernatural specter. For the cinematographer, however, the true terror is opening the script and reading: In complete darkness, our hero struggles…
When visualizing the terrifying images of the horror genre, the cinematographer can be faced with many challenges, but the tools at hand — the shape, texture and color of the light; composition; and camera movement — enable a powerful creative voice that can create edge-of-the-seat suspense and heighten the overall impact of the story.
“You can operate in edge light and sell a “no-light” look.”
Lurking in Darkness
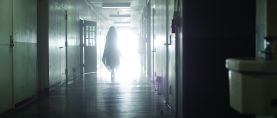
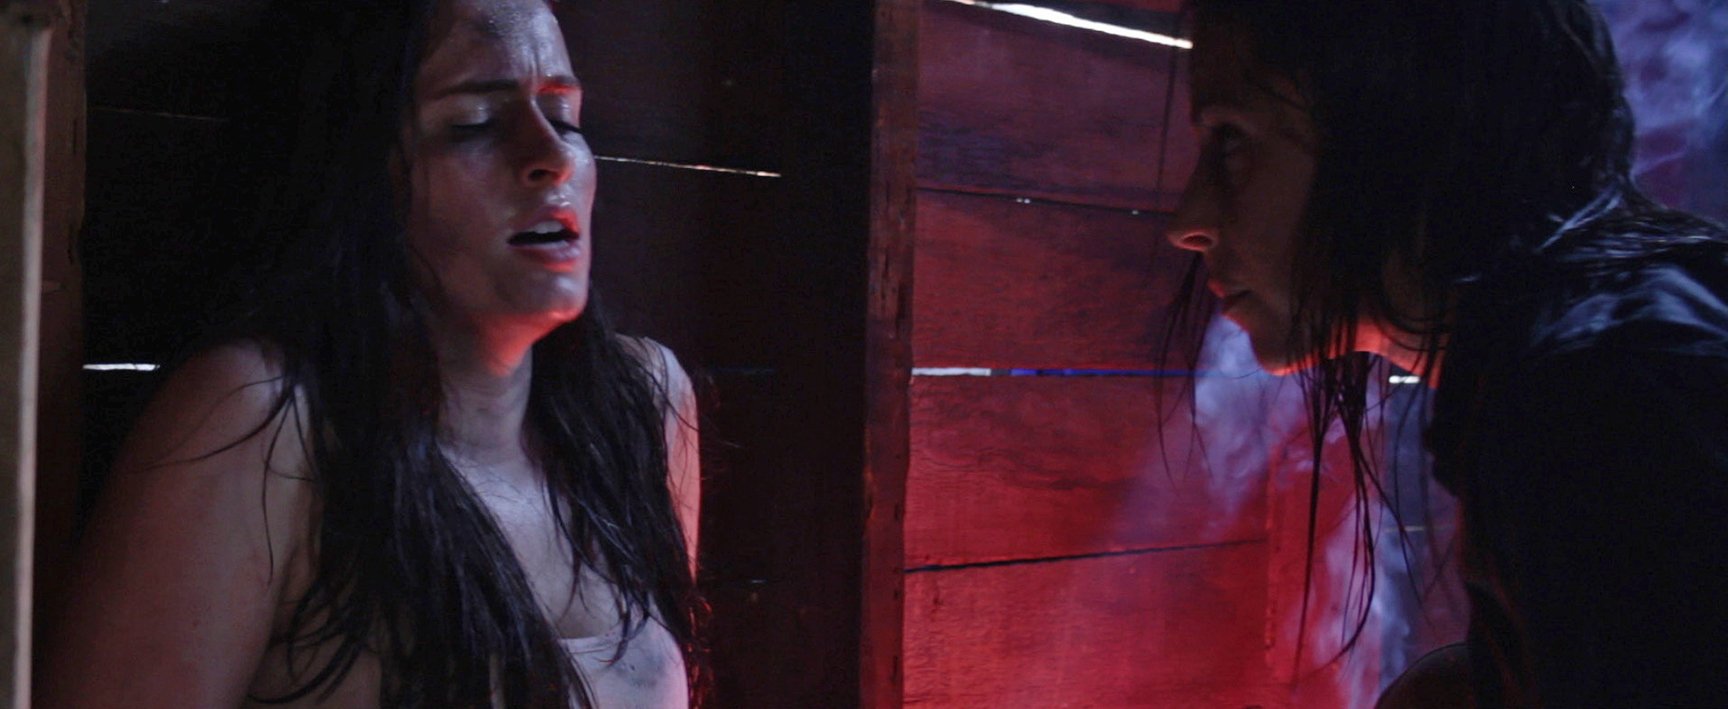
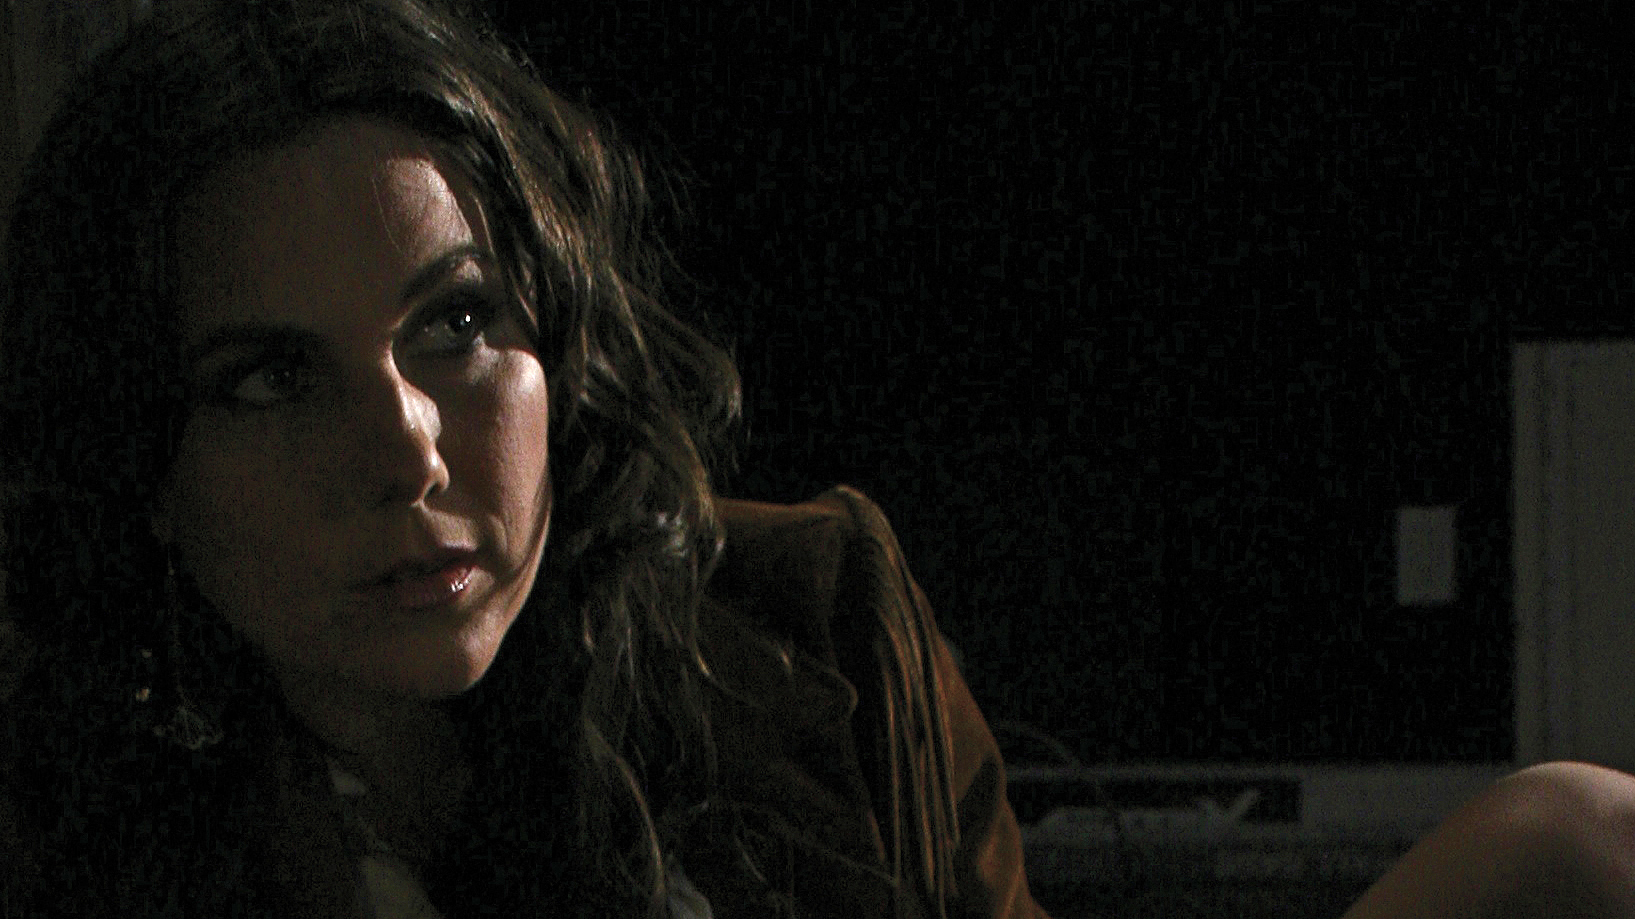
One of the most common challenges when shooting suspense or horror is having a character in “complete” darkness. How do you create an image when there is no light? One of the keys is to embrace the conceit that you can operate in edge light and sell a “no-light” look. If you keep the face in deeply underexposed, soft fill light and shape the character with a strong edge light, you can create a feeling that they are in the dark while they and their actions are still somewhat visible to the audience. More importantly, depending on the placement of your edge, the blocking of the actor and the amount of underexposed fill, the audience can clearly see the actor’s performance and emotions.
Setting your key source behind your subject at a position around 10 o’clock or 2 o’clock will give you a sharp, edge-defined shape for the talent while keeping light out of their eyes and off most of their face. You can fill the face to bring out subtle details with a soft bounce that is well underexposed — 2 stops or more. That way, the audience can make out basic details but still believe the character is in darkness.
Room Tone
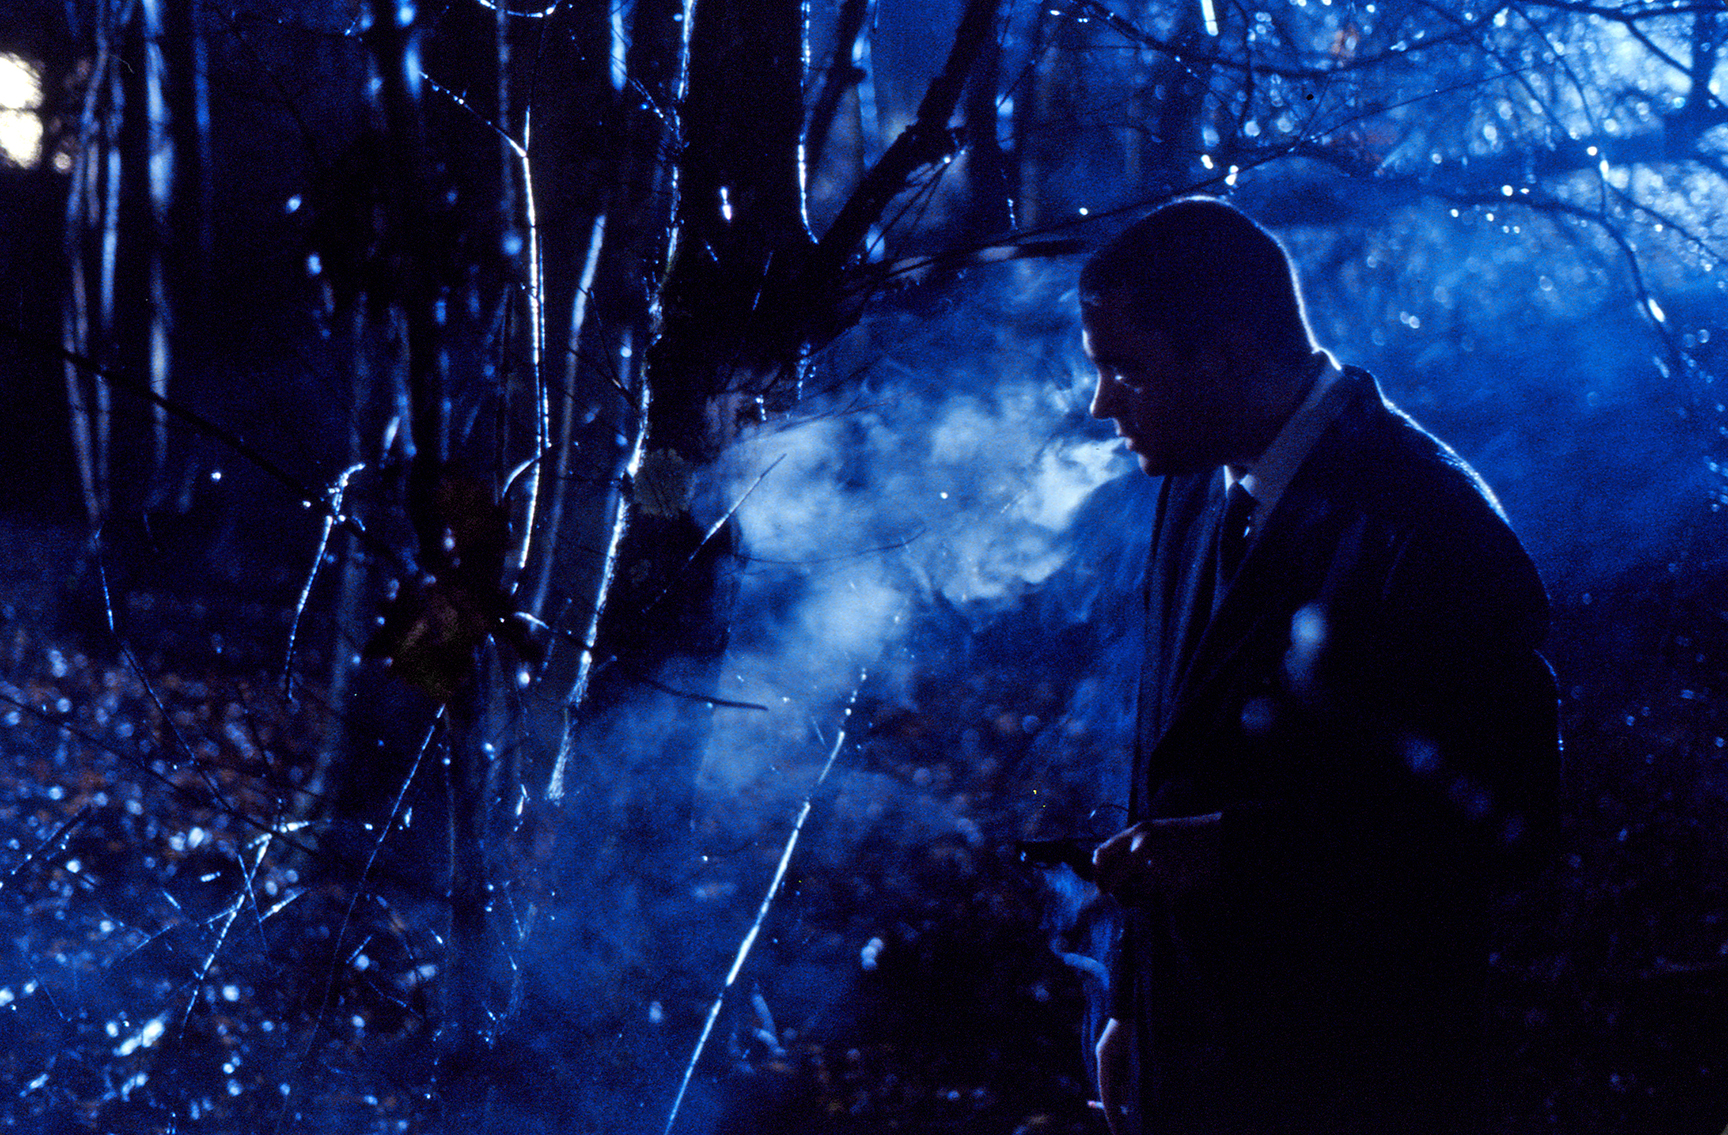
Another method of conveying darkness in a scene is control of your “room tone” — the base level of exposure — which, when seeking to accomplish the goals discussed here, would come from a source that just brings up shadow detail (aka the “toe”) to an observable level. This is often achieved with a large, soft, overhead source that can be well underexposed. Often described as “shadowless” and “directionless,” this type of source can be a fixture bounced into the ceiling; a large soft box or balloon; or, on stage, a series of space lights — and the source should generally be dimmed down to a level of 2 or 3 (or more) stops under your key exposure. This source can also be at a higher color temperature compared to your subject lighting, as we often associate cooler light with night or darkness. (See “Color of Night” section, below.)
Separation Light
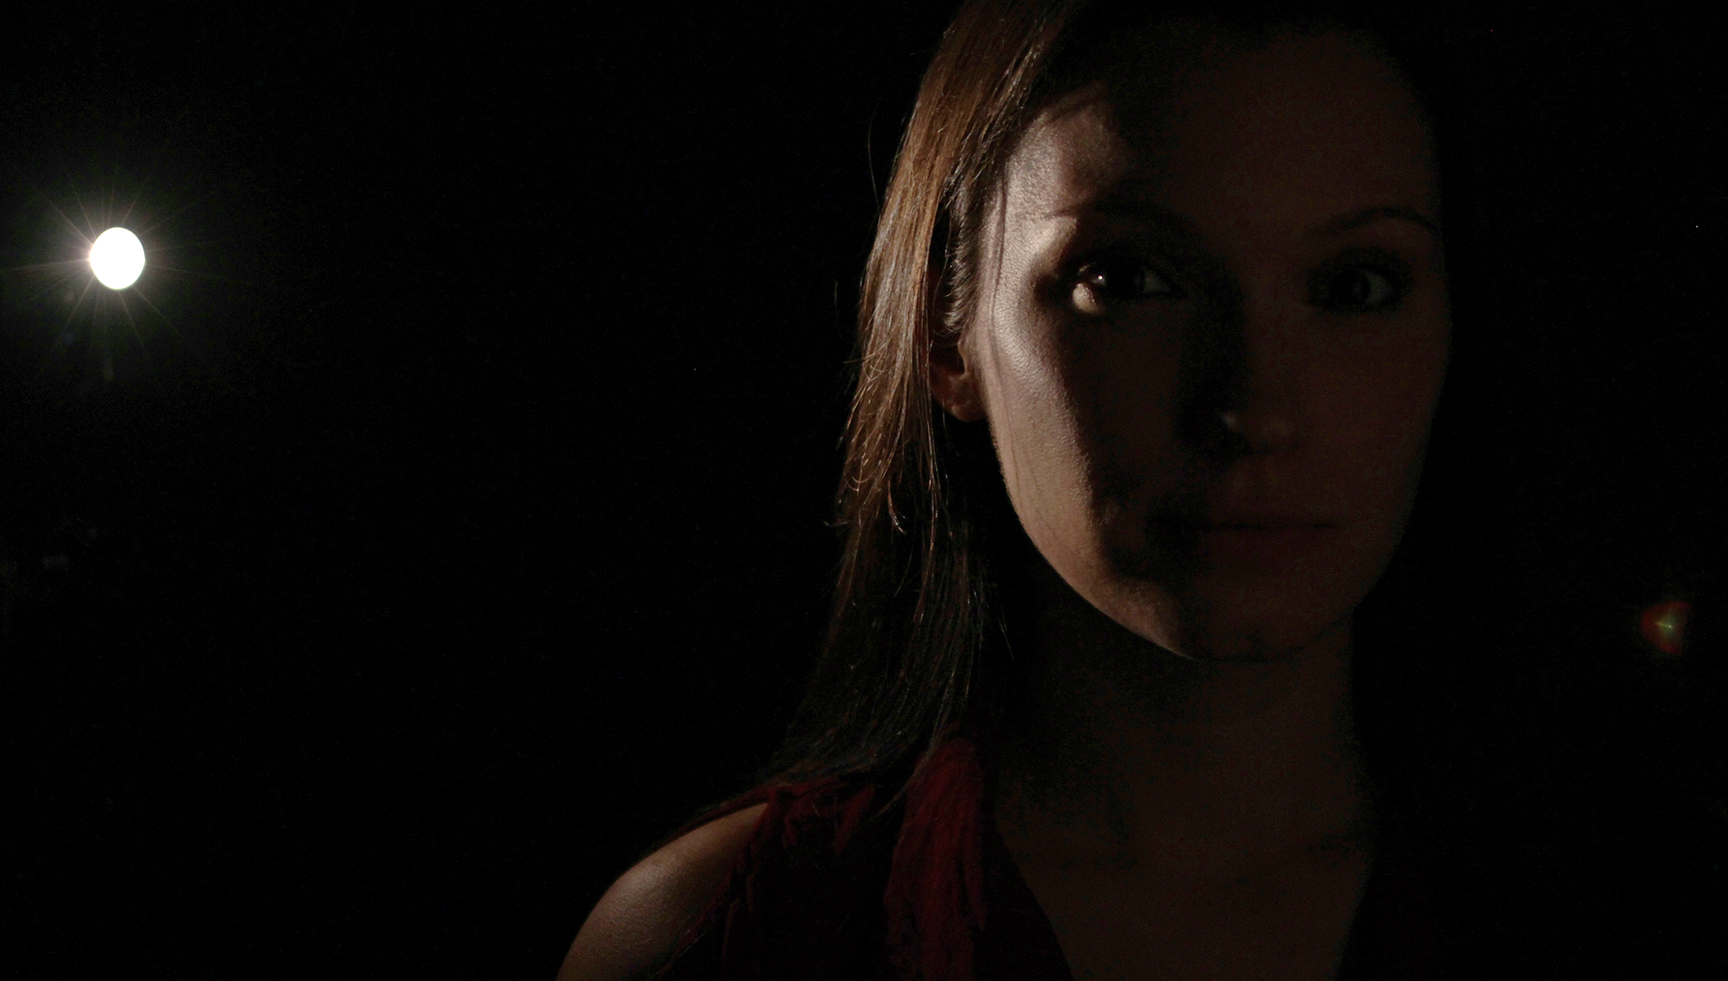
Another approach is to completely silhouette the character in the environment. By placing light on the background, especially in selective or carefully controlled areas, you can position your talent in front of these background areas and get a clear silhouette to show they’re in the dark.
There’s a lesson to be learned from animators here. Traditional animators are taught that the story is in the silhouette — you should be able to remove all detail from your animated character, see only their silhouette, and still get a clear idea of what’s happening in the story. Sometimes this requires the subject to turn their head or body so that the profile of their face is clearly outlined in silhouette. This can be a powerful cheat! Keep this concept in mind, as it truly aids in visual storytelling, especially in dark situations. If the audience can get the pertinent story information from a character’s silhouette, that will sell the concept that they’re in darkness quite beautifully.
Moving Through Pools
The character doesn’t need to be clearly visible at every moment in the scene. There can be times when they fall into complete blackness or be only partially visible in edge light, silhouette separation, or even patches of front or side light. Mixing it up can add interest and intrigue. If the character moves through pools of light, enabling us to see what we need to see at specific moments, then it’s fine that we don’t see the character at other moments.
Also, consider the parts of the body that must be seen for the story to be clear. If someone is lurking in the dark and picks up a knife, it may not be necessary to see their face when they grab the weapon, but it is necessary to see their hands. A selective pool of light right at the hands will do.
Adding Texture
Some things that can help in designing these pools, and motivating them, are various textures of light. Whether the illumination is coming through windows, sheer drapes or tree leaves — and perhaps motivated by moonlight or streetlights — the textured pattern of chiaroscuro light/shadow effects can justify the pools and add interest when the subject does come into some light.
Falling rain on windows can create a moving pattern of light and shadow. Even abstract slashes, breakups or patterns of light and shadow can accentuate these effects — and realistic motivation (i.e., where the pattern itself is “actually” coming from) isn’t always necessary. So, feel free to add a little taste of the abstract into your night sequences. These patterns also help to conceal details from the audience, accentuating suspense.
“Don’t be afraid to have overexposed elements in dark scenes.”
It’s All a Cheat!
Almost all of these approaches have a degree of conceit. If we were to depict the character in true blackness, then the audience would have no idea what’s happening except for what they can discern from sound. So, we must cheat a bit to provide some light so that we can see what’s occurring and understand the important story details. However, the key to keeping things visually interesting is in the mix of highlights and shadow. An overall underexposed image is hard on the eye and tends to look muddy. A brighter edge or background helps to refine the look and make it more visually acceptable, even though it’s an entire cheat. Don’t be afraid to have overexposed elements in dark scenes; these little hits of bright light also help to keep your audience’s pupils closed down, which creates the perception of crisper blacks in your image.
Color of Night
Cinematographers have debated the color of moonlight since color film was introduced. Moonlight is actually sunlight reflected off the surface of the moon; this falls at about 4,100K, which is warmer than typical daylight — yet it is an accepted convention that moonlight is bluish in tone. If you’ve ever been out in the wilderness (far away from light pollution) during a full moon, you may have been surprised by how bright the cloudless night can be. Though moonlight itself is often cheated in movies, there is truth to the idea that you often can see reasonably well when moonlight is the only illumination.
The perception that moonlight is cooler may be due to the limitations of human vision in dim light, or scotopic vision. In very low light, only the rod cells in the eye are activated, and they are most sensitive to the blue-green spectrum (a phenomenon known as the Purkinje effect). So, this lends some credence to the concept that moonlight has a blue quality. Whether or not you happen to agree with this concept, giving a cooler color to your nighttime light can help sell the idea of night, as it is a well-established component in the language of visual imagery. I’ve found that the cooler the fill, the darker the look feels. When the fill is more neutral or warm, it tends to feel more comfortable or romantic.

Framing for Frights
The compositional choices the cinematographer and director make can also accentuate the drama or suspense of a given moment. Psychologically speaking, any unbalanced composition can create tension; asymmetry or atypical framing can create discomfort in the viewer. Two highly effective choices in framing for suspense are leaving excess negative space in the frame to suggest something will appear there, and shortsiding, or placing the subject’s eyeline at the edge of the frame to give a sense of claustrophobia and entrapment.
Shooting through objects — that is, having obstructions in the frame — can create a sense of mystery and even cause the audience to lean to the side to try and see around the object in the frame.
Further, movement to the frame — especially slow, deliberate movement that may be out of sync with the characters — can create a sense of dread and suspense. A slow pan with a character moving in and out of frame creates a sense of anticipation, especially when the audience is expecting to be frightened or surprised. Asynchronous movement can even be more effective if it doesn’t result in that fright or surprise. Circumvention of expectation is a wonderful tool in the creation of suspense.
Generally, the more unease and unpredictability you create in the image, the more suspense the audience will feel, provided you present the requisite frightening or surprising “payoff” from time to time.
“Any unbalanced composition can create tension.”
Through the Eyes
The varying of subjective and omnipotent points of view is a powerful tool for creating scares and suspense. The subjective point of view can mean a literal POV (seeing through a character’s eyes), but it is more often a POV that the camera follows to establish the emotional context of a character in a scene. When adhering to the subjective narrative POV, if a character is unaware of a piece of information, we, the audience, are often also unaware. In this way, the subjective POV can provide our jump scares — but it is the omnipotent POV, which reveals information the characters don’t know, that creates suspense.
To paraphrase Alfred Hitchcock, if you have two characters talking at a table and the restaurant suddenly explodes, that’s surprise. If, however, during the conversation, the camera cuts to under the table and we see a bomb with a timer counting down — but the characters continue their conversation unaware — that’s suspense. While those two concepts refer to the editorial structure of a scene, the same can apply to composition, shot selection and coverage of a scene. It’s important for the cinematographer to understand how the scene might be constructed later by the editor and director; this will provide invaluable information regarding lighting, framing and camera moves.
Disorientation Through the Lens
When choosing lenses to shoot a suspenseful scene, there’s no right or wrong, as it depends on creative interpretation. However, wide lenses close to a subject can evoke a claustrophobic and uncomfortable invasion of personal space that can create discomfort in the audience. Inversely, a long, tight lens that only reveals a tiny component of a character’s face or hands can also be unsettling. Specialty optics such as fisheye lenses, a Mesmerizer and split-field and custom-shaped diopters can all add an unnatural feel to a scene.
When you’re on location and don’t have full control over the lighting, a set of graduated neutral-density filters can come in handy for dark scenes to help drop portions of the location into deep shadow. Experiment with ND grads and you’ll be surprised how often they can literally shape the look of your shot.
Perhaps these tips will give you courage on your next terrifying production. We don’t always have to be afraid of the dark!
Jay Holben is an ASC associate member, AC’s technical editor, and co-author of The Cine Lens Manual. All images courtesy of the author.